Showing posts with label energia. Show all posts

Friday, 6 October 2017

Autumn Update

Some recent updates on the Github:

  • Interrupted is now compatible with the Arduino (1.8.4 and above) and Energia (18 and above) IDEs. However you have to cut-and-paste the examples, for now.
  • Tasks is also compatible with the Arduino and Energia IDEs, and (maybe) PlatformIO. Ditto caveat about examples.
  • uC-Makefile has been updated for the latest Arduino and Energia IDEs. Unfortunately Energia has discontinued support for the Stellarpad, so this option is now busted.
  • invaders now compiles under Energia 17, the last release to support Stellarpads.
  • WeatherGuy has had an ESP8266 refresh as WifiWeatherGuy. Stay tuned for more information on that.

Monday, 19 October 2015

The Dining Philosophers

It seems as if this blog has been veering towards software for a while now, and this post is about as far from hardware as it's ever been --- but hey, it has LEDs!

The problem of the Dining Philosophers was first described by Dijkstra in 1965 as an example of resource allocation in concurrent (operating) systems. Briefly, five philosophers sit around a table with a bowl of spaghetti in the middle, spending their time alternately thinking and eating. There are five forks at the table, one between each philosopher, and in order to eat, a philosopher requires those adjacent to him.

Two important properties to be addressed by a solution to the problem are: safety and liveness. The first means that the solution is free from deadlock while the second requires that every philosopher eventually gets to eat. There are many solutions but the one implemented here is that proposed by Dijkstra himself: freedom from deadlock is ensured by introducing an asymmetry: the lowest numbered philosopher reaches for his right-hand fork first while the others reach for the fork on their left.


In the solution, each Philosopher is implemented as a Task and each fork as a Semaphore.

Tasks are non-preemptive, light-weight threads of control, they run until they call a blocking function, for example waiting on a Semaphore or sleeping for some time.

There are two kinds of task, the implicit one which runs setup() and loop(), and explicit ones which inherit from class Task and must provide their own stacks, here, 50 words.

In the example, the main setup() initialises the Task system and starts the explicit tasks; it then implements the behaviour of Philosopher #4 in its loop().


In the video, red LEDs indicate a thinking philosopher and green ones a philosopher eating spaghetti.

As always, the Task library is available on Github for Arduino and Energia.

Sunday, 11 October 2015

mspdebug

When it comes to debugging programs, the first tool in my toolbox for compiled languages like C or C++ is usually 'print'. I don't tend to bust out a debugger unless I'm in an IDE such as IntelliJ.

This can pose problems for me in a relatively print-challenged environment, such as msp430 on Linux. Last night I had found myself in just this situation when I found myself musing on why the msp430 upload tool was called mspdebug. A quick search found a nice manual and a few minutes later I was debugging away.

Here's a sample transcript:

With the sketch already uploaded to the board, this script shows how to:

  • Generate a name-list from the sketch's Elf file
  • Import these symbols into the debugger
  • Set a breakpoint by name in the program
  • Run the sketch up to the breakpoint
  • Single-step the program once the breakpoint has been reached.
If you're interested, the sketch is a rather convoluted version of Blink.

Monday, 11 May 2015

Interrupted

Interrupted is a new approach to developing low-power, low-latency Arduino sketches, which was motivated by two observations:
  • That the default mode of programming for Arduino is busy-waiting, and
  • The runtime support for power management provided by avr-libc is basic, being charitable to it.
Taken together, these two points mean that Arduino sketches aren't easily battery-powered, while the second results in a cargo-cult of code copying. Lastly, timed sleep in Arduino is provided by delay(), which itself is busy-waiting. This increases latency, the response time to external events such as button-presses.

And so to an example; the sketch below manages a very simple hardware configuration composed of an ATtiny85, an LED and a button: the button turns the LED on and a timer turns it off again. (You could imagine such a sketch driving a Useless Machine.)

In the main loop, the CPU sleeps in select(), waking up when an event occurs on one of the devices it manages. Three events are possible here:
  • An external interrupt which occurs when the button drives pin PB2 low,
  • A pin-change when the LED on PB0 is turned on or off,
  • When the watchdog timer fires, one second after the LED comes on.
The value returned from select() indicates which event has woken it up, allowing the concise construction of state-machines. If more than one event source is ready, the one added earlier in setup() is returned, implementing a crude form of priority.

The sleep-mode entered by select() is the maximum which makes sense for the devices currently active. In this little example, SLEEP_MODE_PWR_DOWN will be chosen because external and watchdog interrupts still work in this mode.

Much credit is due to Nick Gammon, for the great work contained in his Interrupts and Power Saving Techniques for Microprocessors forum-pages.

Very similar techniques were employed in the runtimes of the Conic and Regis environments developed at Imperial College (as well as the select system call, of course).

The library has been ported to ATtiny84, ATtiny85 and ATMega328 processors and is, as always, at GitHub. Its code footprint varies, depending on the functionality required by individual sketches, but the little example above comes in at 2.5kB.

Work remains to be done on this library including porting it to Energia (i.e., the msp430 family), porting existing sketches to use it and completing the repertoire of supported devices (e.g., SPI handling).

Wednesday, 3 December 2014

Space Invaders!

When I was a teenager Space Invaders arrived and changed the world. I must have put pounds into that machine in the local chipper, in the days when chips cost shillings. It never occurred to me that you could actually buy one of your own until one of my brother's friends' fathers did. (Come to think of it though, if I'd kept all of the cash I put into various machines, I probably could have had one of my own. I believe this is known as delayed gratification.)

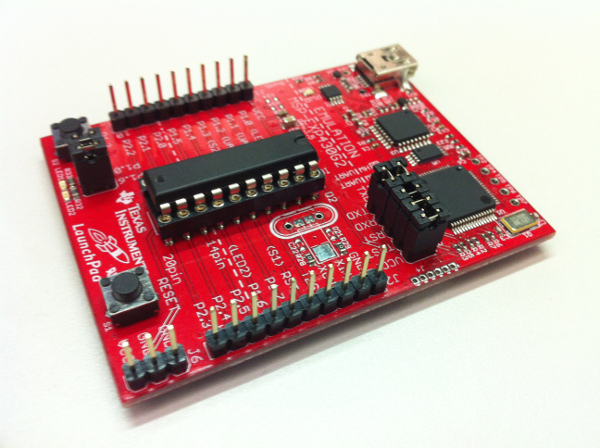
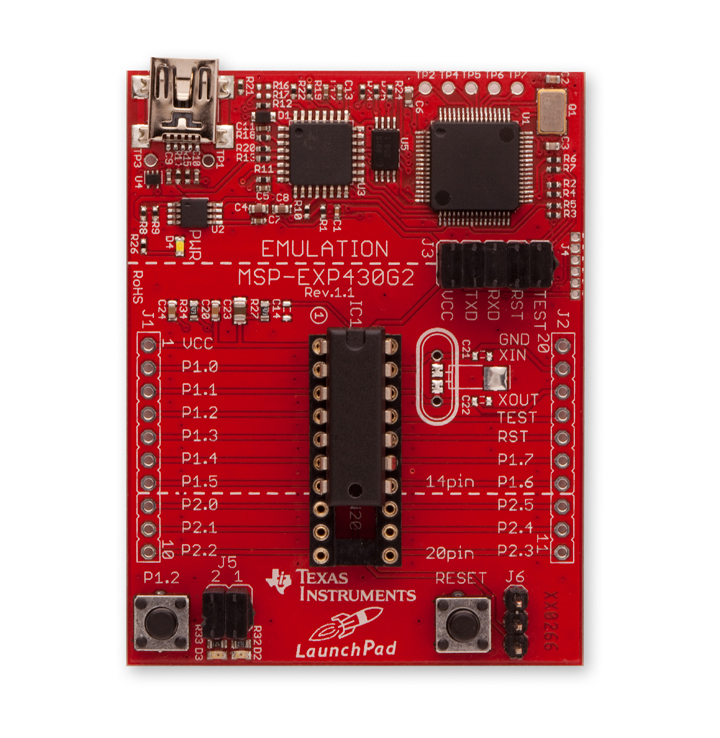
Same Hardware, Different Processor!

Fast-forward 30-odd years and I'm sitting there blogging about an emulation of an 8-bit microcomputer of similar vintage. Hmm...

Space Invaders hardware comprises an Intel 8080 clocked at 2MHz, 8k ROM, 1k RAM and 7k memory-mapped video RAM. (An Emutalk thread has all the details and the ROMs.) The most difficult part is definitely the CPU but that only has to be done once to open up a whole world of crap games.

There are dozens of 8080 emulations out there, of varying quality. (Most of them written solely for this game!) I picked one and remixed it in the spirit of the 6502 emulator I made for the UK101; it plugs into that framework quite easily.

When a moderately-complex project like this links for the first time, the natural thing to do is upload it, more in hope than expectation, and when it fails, start debugging. The best way to do this is with a test-suite, preferably one which someone else has written in advance. (This worked out really well for my 6502 core thanks to Klaus Dormann's excellent 6502 tester.)

For the 8080, all searches led to a 'CPU exerciser'. Rather than testing a single instruction in isolation, this program runs a group of operations with different arguments and merging the resulting CPU state into a checksum as it goes. If the final checksum obtained by 'your' CPU is the same as one from a real chip, you know (to a high probability anyway) that your implementation is good for the instructions tested. (Luckily, that page documents results from real CPUs so there's no need to dig up an old 8080 board.)

If that sounds daunting, it is! Fortunately a preliminary test is also provided which tests the instructions required to run the exerciser itself. This helped fix a few bugs on its own and, since it used the CP/M "bdos conout" operation to report success, raised the interesting possibility of implementing a virtual 8080-based CP/M machine. I subsequently found a slightly more complex set of tests in another emulator's repository which helped find enough bugs to get all-but-two of the exerciser's tests passing.

(Timings of the exerciser indicate that my 8 year-old Lenovo laptop runs an emulated 8080 about 80x faster than the 2MHz 8080 for which it was intended. I haven't timed it on a Stellaris Launchpad however.)

Adventures in Dremel

So, despite the fact that some bugs remain in the emulation, enough of it is working to run Space Invaders properly. It runs at correct speed because it is driven by a timer interrupt (emulated with Energia's millisecond timer) and therefore we didn't need to bother keeping track of individual instruction timings, which all of the CPU emulators I looked at did. (Most of them were similar in other ways too, indicating a common influence, perhaps in this document.)

Just like the real thing, if you're 6" tall.

You can find the whole thing at Github, as usual.

Wednesday, 12 November 2014

In the Beginning... was the Command Line

Say what you like about the Arduino IDE, it's certainly lowered the barriers to entry for kids messing about with microcontrollers. 

Oh wait, that's not what I wanted to say at all...

Sometimes the Arduino IDE is simply not enough. It just gets in your way. Your project has outgrown it.

These were a few of my more printable thoughts as I tried to force a quart of UK101 emulation into the pint-pot of that tiny editor window. At times I'd no idea which file I was even editing! I longed to bust out emacs (or even vi).

What I really wanted was make. In particular GNU make. Simply the best build-tool ever, no question.

Many people have written Makefiles to build Arduino sketches but none of them felt right to me. They were all too complicated, too monolithic. Or maybe it was just a case of not-invented-here. In any case, I present uC-Makefile, which supports Arduino-1.0 and Energia.

The best thing about it so far has been control over the compiler's optimisation levels. Compiled with optimisation -O3, that old microcomputer's emulated Basic interpreter ran almost 5x faster!

Bye-bye, Arduino IDE!

Wednesday, 20 August 2014

Retrocomputer Resurrection

"What's a Computer?"
This chimera is a microcontroller emulation of a UK101, an 8-bit microcomputer from the early 1980s. Needless to say I had one; it is a shocking thirty-three years since, as a spotty teenager, I soldered one together over the course of a few days. I recall the kit cost the equally shocking sum of £99.95 (a lot of pocket-money), and had to be smuggled through Irish customs in my parents' car because the Single European Market was at that time merely a twinkle in M. Delors' eye. In its original configuration it had 1k of user RAM, 1k of display RAM, 8k ROM Basic (from Microsoft) and a 2k ROM monitor. When it went to its present resting place in the attic a couple of years later, it had 16k of user RAM, 2k of display RAM and an additional 6k of utility ROM, all piggy-backed on the original chips.

The last time I had patently too much time on my hands, in 1997 (seventeen years!), I hacked together a software simulation of it. I had intended this to be a general purpose simulator but it fell by the wayside after the UK101. In the intervening time I'd often regretted not writing the simulator in Java (indeed, a very good Java-based simulator now exists) but luckily where microcontrollers are concerned, C/C++ is still the only game in town, and most of the code compiled under the Energia IDE.

The hardware is almost insultingly simple, there are five components:
  • A Stellaris Launchpad from Texas Instruments,
  • An SD card drive,
  • A TFT LCD boosterpack,
  • A PS/2 socket,
  • A PS/2 keyboard.
While the Launchpad has only 16k of RAM, of which 12k is used for the main memory and 2k for the display, it does have 256k of flash, easily enough to contain all of the ROMs I've collected for it. (Another UK101 hardware instantiation can support the full 40k of user RAM.)

This build's main limitations are the display (only 30 lines of 40 characters vs the original's 32x48 ---  affordable TFT screens max-out at 240x320 pixels these days) and the keyboard (a lot of the games use the Control, Left-shift and Right-shift keys, which aren't available individually from the off-the-shelf PS/2 keyboard library).

However it has one modern advantages over the original which almost makes it enjoyable to use: checkpointing and restoring the machine state using the SD card. This allows creation of initial game images (which load instantly since they're only 14k) and progressive checkpoints, as adventure games are completed, for instance, or new programs developed.

Space Invaders: it doesn't get much better than this!
Code and programs are at GitHub, should you care.

The final thing is to find a suitably retrotacular housing for it. Something like this would be about right...

Kim Greist in "Brazil" by Terry Gilliam


Tuesday, 29 July 2014

RF24 with MSP430 revisited

Well it's taken longer than expected, but today the RF24 and RF24Network libraries are finally ready for use with MSP430. (Get them from GitHub as usual.)

The main improvement is to switch from using the C++-preprocessor to conditionally-compile debugging printf() statements, to explicitly configuring a debugging class into the sketch. For an example of its use, see the revamped pingpair sketch.

The advantage of this is that it allows other approaches to debugging, such as blinking LEDs (on platforms without serial ports) or using plain old Serial.print() on platforms too constrained to support printf(), such as the ATtinys. A secondary advantage is that it makes the mainline code easier to read.
MSP430 (with jumpers set for Hardware UART)

Note that the MSP430 has a fairly restricted serial port itself, at least compared to what we're used to from Arduino. A long description can be found here, but suffice it to say that, as shipped, you have to change jumpers to see anything output by Serial.print() and what you get is limited to 9600 baud. This means that the very act of debugging can cause some of the examples to timeout, so caution is required!

Linux users are rewarded with an additional set of problems to deal with, as documented here. Follow the instructions from the section "Fix a Linux kernel bug..." to rebuild the relevant kernel driver. (Note that there are some existing patches floating around the network which no longer work because this driver has seen some updates recently --- my kernel is version 3.11).

Once the driver was patched, I found that the serial port is best accessed using minicom as root. (Furthermore the first attempt at an upload usually fails for me, although the second and subsequent ones succeed.)

Finally note that a quick smoke test showed these libraries working on the Fraunchpad and Stellarpad too, although serial port issues prevented me seeing any debugging info on these targets.

Saturday, 7 June 2014

RF24 with Energia and MSP430

Energia pinout on TI Launchpad
The MSP430 is a considerably easier target for RF24 than the ATtiny because it actually has its own SPI interface, see above.
// Set up nRF24L01 radio on SPI bus plus pins 8 & 9
RF24 radio(P2_1,P2_0);

// sets the role of this unit in hardware.  Connect to GND to be the 'pong' receiver
// Leave open to be the 'ping' transmitter
const int role_pin = P2_2;

Making the changes above to the pingpair sketch, allows a TI Launchpad to play an equal role in this proud application via Energia.

It's still early days for this project, this is really just a proof-of-concept. Things to be done include: porting RF24Network and reducing the library footprint, the pingpair sketch comes in at just over 8000 bytes (I think that unwanted parts of the stdio library are being included). Stay tuned!

Sunday, 3 November 2013

Homebrew msp430 Development Board

While not exclusively devoted to AVR microcontrollers, this blog has concentrated on them for one simple reason: they are very easy to get started with. Whether for beginner (Arduino) or professional (GNU make and gcc), the software ecosystem is very mature. Furthermore, a proliferation of cheap Arduinos (and clones) means that even lack of hardware experience is no barrier to entry.

Texas Instruments has been relatively late to the party with their launchpad line of msp430-based microcontrollers and, until quite recently, a steep learning curve awaited the newcomer. That has all changed with the creation of an Arduino-compatible core for the msp430 and a fork of the Arduino software, Energia, which provides an experience almost indistinguishable from Arduino itself.
msp430 'launchpad' experimenter board

One further thing missing, until now, was ease of prototyping with the microcontrollers themselves outside of the launchpad development kits. The latter actually contain two microcontrollers, one to act as a usb programmer and the other to run user-programs. (While the first actually provides more features than that, that's all a beginner sees.) Thus a hobbyist wanting to use an msp430 for a real-world application had two choices: use the launchpad experimented board itself 'in the field', or program the microcontroller in the experimenter board and then move the newly programmed chip to its permanent home by hand. Easy field upgrades of firmware would require a more complex solution.

Such a solution has been in the works by members of the 43oh community for about a year now. This is a combined USB-stack (cf., v-usb) and bootloader which allows uploading of user programs via a simple USB cable. Only three resistors are required to support USB.

My hardware instantiation of this work (done entirely by others at 43oh and downloadable here) looks like this:
boot430 development board (with g2553)
The bootloader itself is bootstrapped using a development  board: I programmed all of my msp430s at one sitting! Once bootstrapped, user programs can be updated with a simple USB cable and a program called boot430.
Stripboard Layout

The final piece of the puzzle was programming one of these from Energia. Conventionally Energia uses an external program, mspdebug which unfortunately does not speak the same protocol as the USB bootloader. While it is unfortunately not currently possible to configure Energia to use a different uploader, this is a problem which the Arduino team has already encountered and solved in its still-beta version-1.5.

Thus, my somewhat-heretical solution to this problem (at Github): port the Energia launchpad cores back to Arduino, using the same software infrastructure as for the ATtiny development board described earlier. This seems to work quite well, although Arduino has still-unresolved issues in the area of libraries, which leads to confusion about which libraries are actually available on the current platform.